**Cette article est divisé en 3 parties :** *1. Configuration FROM SCRATCH* *2. Import configuration* *3. Reset Configuration*
Brancher le port management au pc Se connecter à l’adresse ip obtenu en dhcp via le navigateur web. Utiliser les logins par defaut « root » et mdp « timeserver » Une fois connecté aller dans Network / Network Interfaces et définir l’adresse ip, sa gateway et son mask. [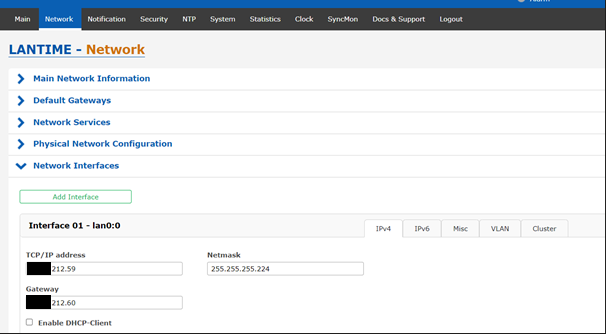](https://cavallone.fr/uploads/images/gallery/2024-10/wfgRFrWSOqPrAYYq-image.png) Remonté dans main Network information et définir le hostname [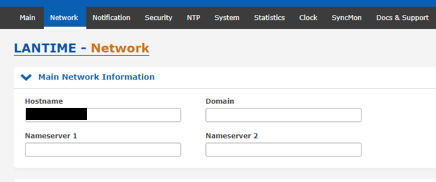](https://cavallone.fr/uploads/images/gallery/2024-10/VrHqXh1cNHjDWBtZ-image.png) Sauvegarder la configuration et valider le startup configuration comme demandé dans le bandeau jaune ci-dessous.[](https://cavallone.fr/uploads/images/gallery/2024-10/hcyoLNJt0CG1g9PI-image.png) Brancher le ntp à son port switch et se connecter à la nouvelle adresse ip pour continuer les modifications. Definir la localisation et langage d’interface préféré dans system / General Settings. [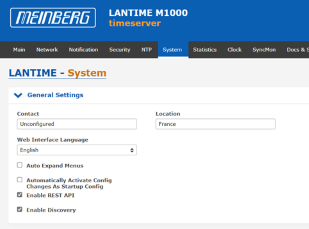](https://cavallone.fr/uploads/images/gallery/2024-10/NN7nkt7chTUCTkaD-image.png) Pour Configurer les clés symétriques, aller dans NTP / NTP Symmetric Keys / Edit NTP Keys [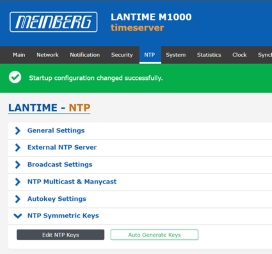](https://cavallone.fr/uploads/images/gallery/2024-10/77fGaBSpqHQ6NYif-image.png) Une fois dans Edit NTP KEYS définir : KEY ID = XXX TYPE = MD5 / SHA1 KEY = MOT DE PASSE SOUHAITE [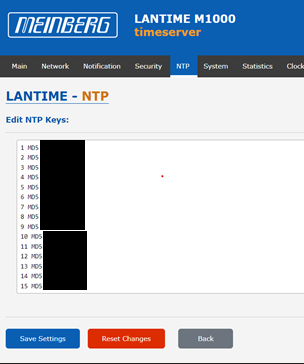](https://cavallone.fr/uploads/images/gallery/2024-10/DBQfNeQed40vVXaj-image.png) Sauvegarder les changements Se rendre Dans security onglets Certificates / Certificates [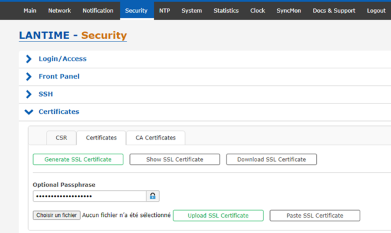](https://cavallone.fr/uploads/images/gallery/2024-10/tQYE316aTnctpobe-image.png) Cliquer sur choisir un fichier, et choisir le certificat en rapport[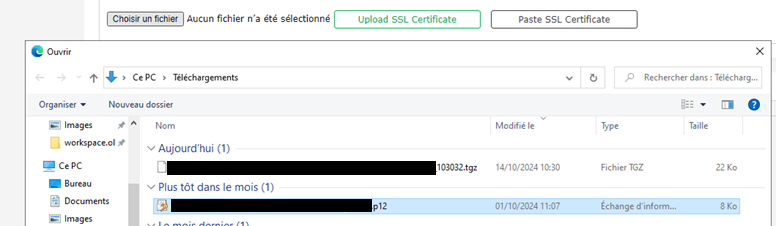](https://cavallone.fr/uploads/images/gallery/2024-11/2oI1xrwP51P6EopE-image.png) Puis définir le mot de passe du certificats [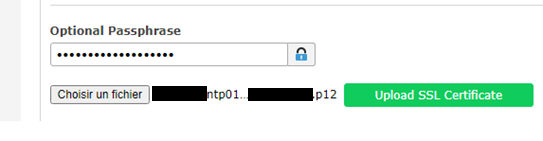](https://cavallone.fr/uploads/images/gallery/2024-11/f021vyPsfY9lX0cc-image.png) Appuyer sur Upload SSL Certificate, le message suivant devrait apparaitre si tout est bon : [](https://cavallone.fr/uploads/images/gallery/2024-11/zFVb5SPow9w3ULVv-image.png) Pour verifier que celui-ci est bien envoyé allez dans Show SSL Certificate[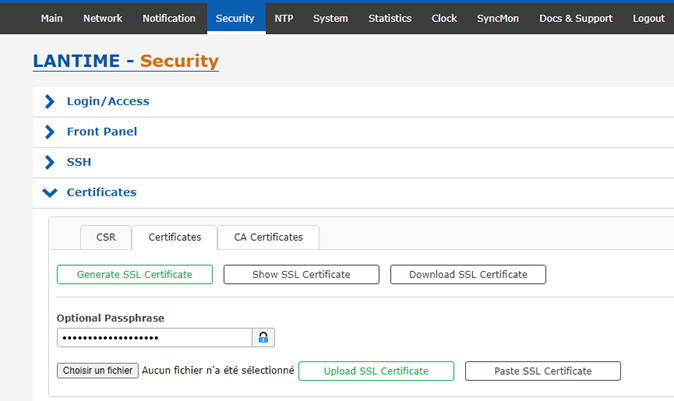](https://cavallone.fr/uploads/images/gallery/2024-11/MHOW7bSGTYE3X3yH-image.png) Le certificat en place sera affiche avec les informations [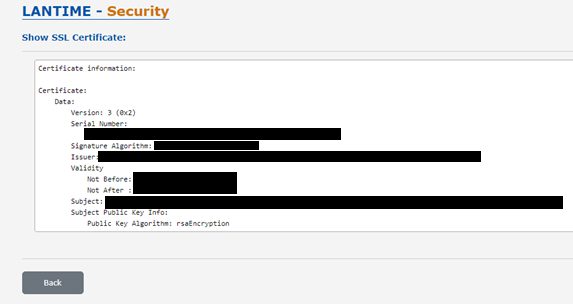](https://cavallone.fr/uploads/images/gallery/2024-11/jr78txin3vErBd9X-image.png) Aller dans NTP / General Settings puis définir les paramètres suivant : Stratum : 2 Local Trusted keys : toute les keys nécessaires aux équipements.[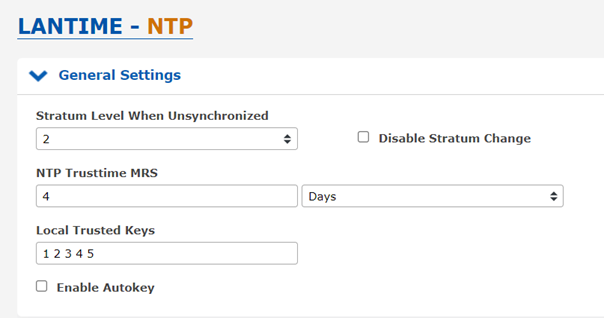](https://cavallone.fr/uploads/images/gallery/2024-11/0U2FXTWnkw0iLvT6-image.png) Aller dans NTP / Broadcast Settings puis définir les paramètres suivant : Broadcast Address 1: IP du NTP Symmetric Key: Les clefs utilisés[](https://cavallone.fr/uploads/images/gallery/2024-11/99xwxZWWO1BeoMe6-image.png) Sauvegarder et Valider la sauvegarde au démarrage. Aller dans Clock / State & Configuration / Timezone Définir le paramètre sur UTC 0 / UTC [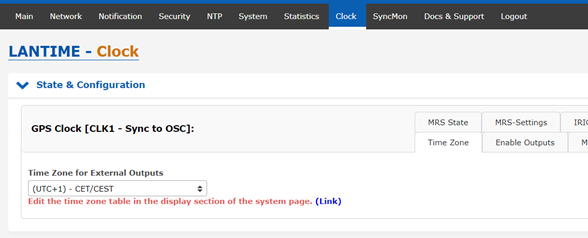](https://cavallone.fr/uploads/images/gallery/2024-11/qBe24VvwTFJdG9La-image.png) Pour modifier l’utilisateur et son mot de passe aller dans System / User Management puis cliquer sur User Administration[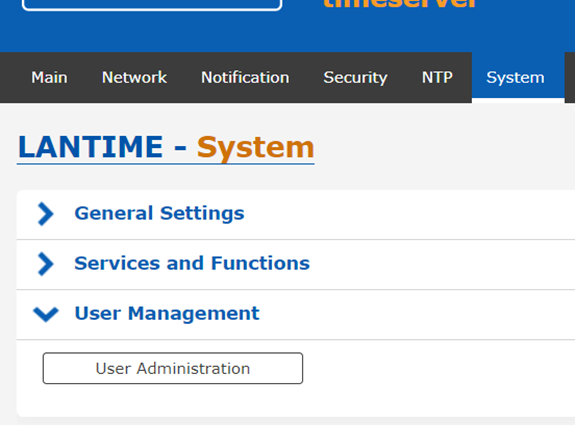](https://cavallone.fr/uploads/images/gallery/2024-11/ifamEZGj2E0N4OLW-image.png) Changer le mot de passe par defaut du root et/ou créé un utilisateur[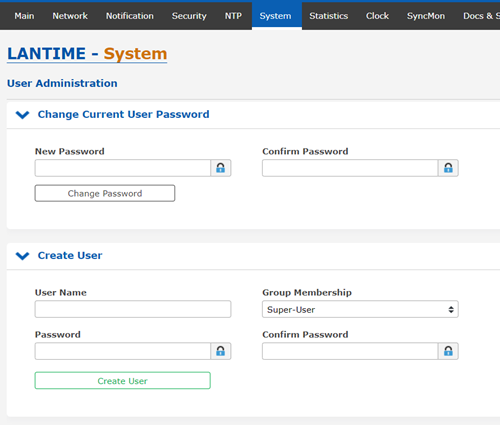](https://cavallone.fr/uploads/images/gallery/2024-11/qszuNxJN78qzCM6i-image.png) ##### IMPORT CONFIG Allez dans système onglets Configuration & Firmware Management [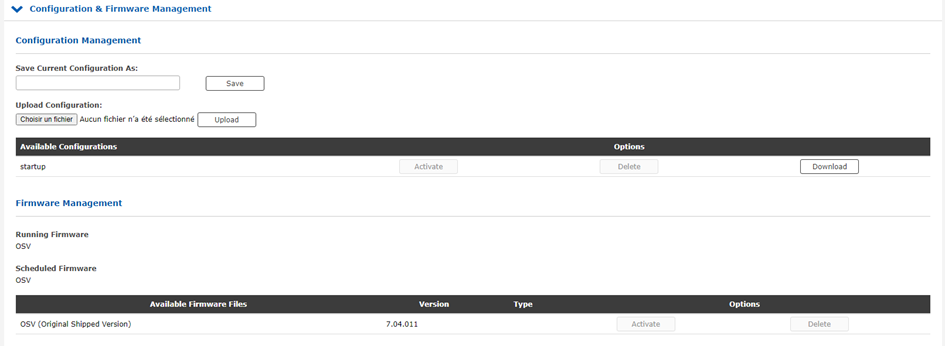](https://cavallone.fr/uploads/images/gallery/2024-11/VB91uoN4h6nU9zLF-image.png) Cliquer sur Choisir un fichier et sélectionner le tgz pour importer la config[](https://cavallone.fr/uploads/images/gallery/2024-11/uoiVcB0vGSjywQ3J-image.png) Une fois sélectionner appuyer sur Upload, le fichier devrait apparaitre dans les configurations available puis appuyer sur activate pour charger la configuration [](https://cavallone.fr/uploads/images/gallery/2024-11/AJxvJz0Qunz4pvNI-image.png) Une fois la configuration chargée le message suivant devrait apparaitre[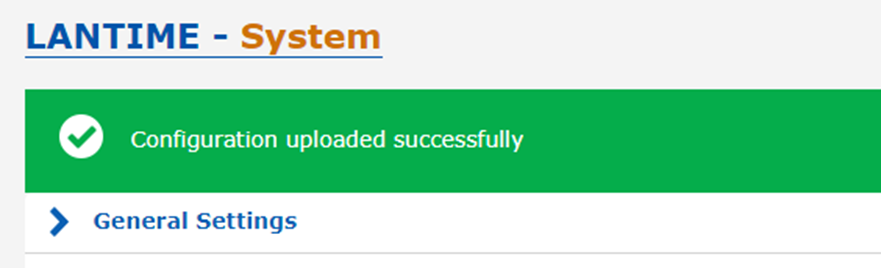](https://cavallone.fr/uploads/images/gallery/2024-11/U2pVi1fYoWCXog1h-image.png) #### Réinitialisation du NTP Allez dans System / Services and Functions puis cliquer sur Reset Factory Defaults [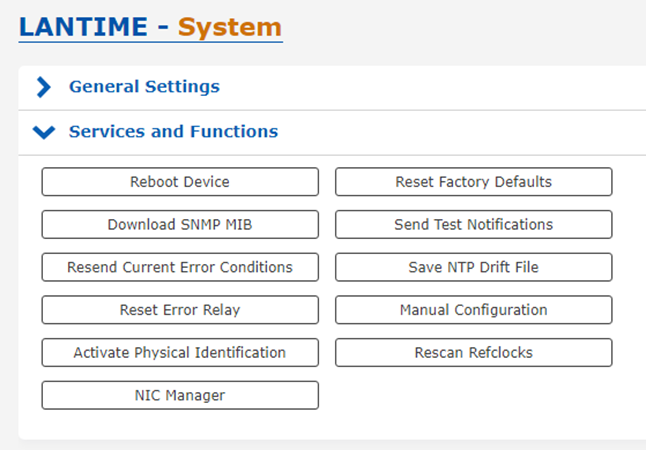](https://cavallone.fr/uploads/images/gallery/2024-11/ajAlN4kejjBZ5zPo-image.png) Le message suivant apparait appuyer sur OK le ntp execute sa réinitialisation [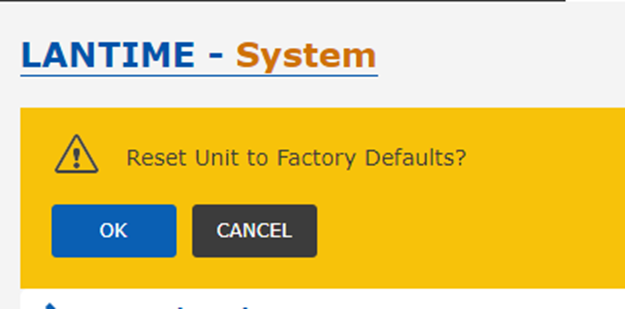](https://cavallone.fr/uploads/images/gallery/2024-11/0VRwjJqBPiImc6f3-image.png)