**Cette article est divisé en 3 parties :** *1. Configuration FROM SCRATCH* *2. Import configuration* *3. Reset Configuration*
Brancher le port management au pc Se connecter à l’adresse ip obtenu en dhcp via le navigateur web. Utiliser les logins par defaut « root » et mdp « timeserver » Une fois connecté aller dans Network / Network Interfaces et définir l’adresse ip, sa gateway et son mask. [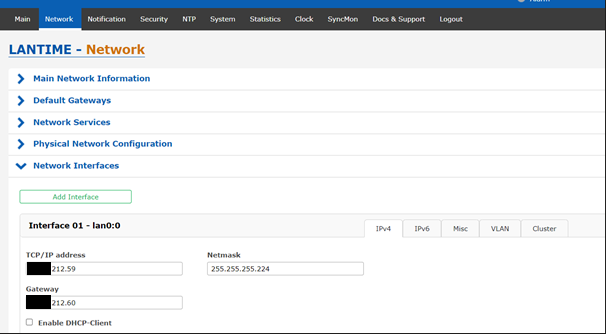](https://cavallone.fr/uploads/images/gallery/2024-10/wfgRFrWSOqPrAYYq-image.png) Remonté dans main Network information et définir le hostname [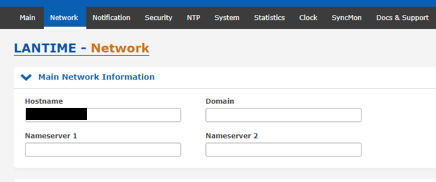](https://cavallone.fr/uploads/images/gallery/2024-10/VrHqXh1cNHjDWBtZ-image.png) Sauvegarder la configuration et valider le startup configuration comme demandé dans le bandeau jaune ci-dessous.[](https://cavallone.fr/uploads/images/gallery/2024-10/hcyoLNJt0CG1g9PI-image.png) Brancher le ntp à son port switch et se connecter à la nouvelle adresse ip pour continuer les modifications. Definir la localisation et langage d’interface préféré dans system / General Settings. [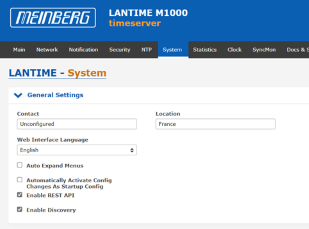](https://cavallone.fr/uploads/images/gallery/2024-10/NN7nkt7chTUCTkaD-image.png) Pour Configurer les clés symétriques, aller dans NTP / NTP Symmetric Keys / Edit NTP Keys [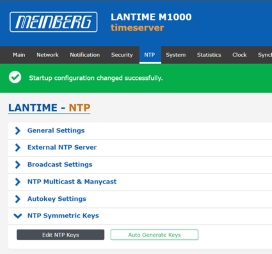](https://cavallone.fr/uploads/images/gallery/2024-10/77fGaBSpqHQ6NYif-image.png) Une fois dans Edit NTP KEYS définir : KEY ID = XXX TYPE = MD5 / SHA1 KEY = MOT DE PASSE SOUHAITE [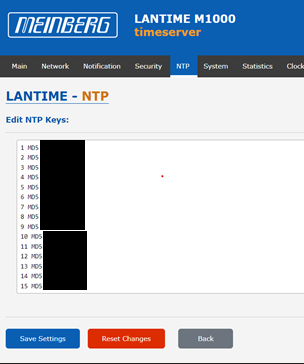](https://cavallone.fr/uploads/images/gallery/2024-10/DBQfNeQed40vVXaj-image.png) Sauvegarder les changements Se rendre Dans security onglets Certificates / Certificates [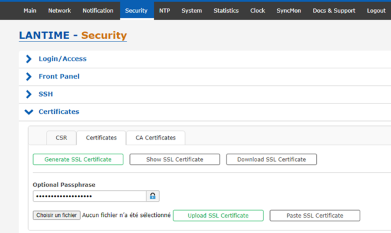](https://cavallone.fr/uploads/images/gallery/2024-10/tQYE316aTnctpobe-image.png) Cliquer sur choisir un fichier, et choisir le certificat en rapport[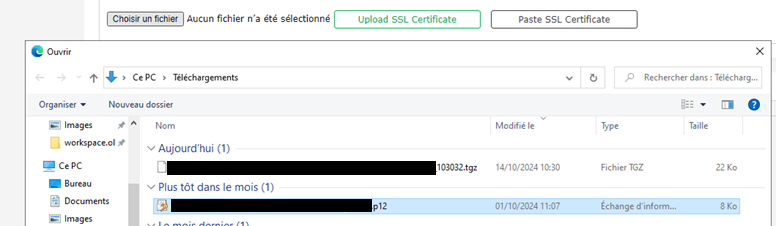](https://cavallone.fr/uploads/images/gallery/2024-11/2oI1xrwP51P6EopE-image.png) Puis définir le mot de passe du certificats [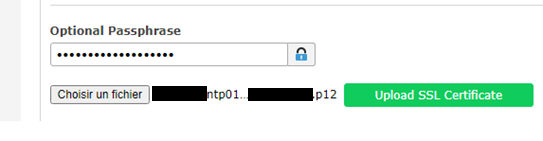](https://cavallone.fr/uploads/images/gallery/2024-11/f021vyPsfY9lX0cc-image.png) Appuyer sur Upload SSL Certificate, le message suivant devrait apparaitre si tout est bon : [](https://cavallone.fr/uploads/images/gallery/2024-11/zFVb5SPow9w3ULVv-image.png) Pour verifier que celui-ci est bien envoyé allez dans Show SSL Certificate[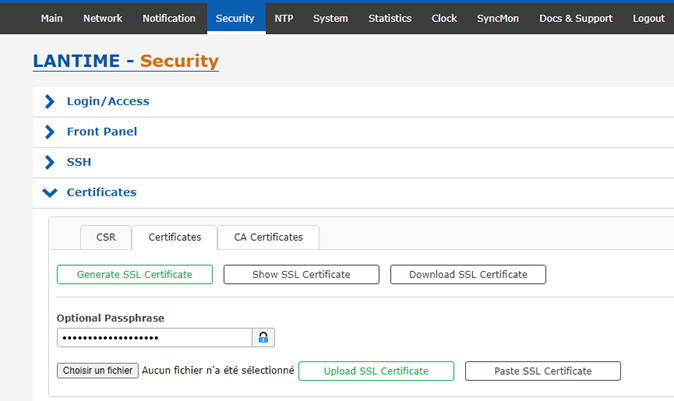](https://cavallone.fr/uploads/images/gallery/2024-11/MHOW7bSGTYE3X3yH-image.png) Le certificat en place sera affiche avec les informations [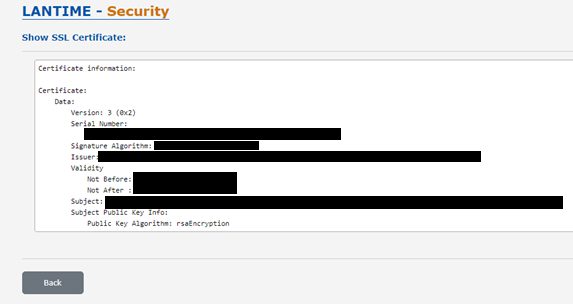](https://cavallone.fr/uploads/images/gallery/2024-11/jr78txin3vErBd9X-image.png) Aller dans NTP / General Settings puis définir les paramètres suivant : Stratum : 2 Local Trusted keys : toute les keys nécessaires aux équipements.[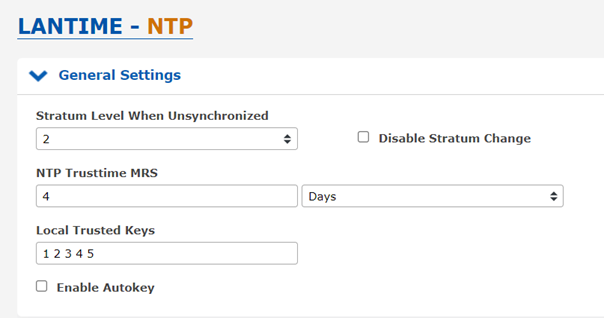](https://cavallone.fr/uploads/images/gallery/2024-11/0U2FXTWnkw0iLvT6-image.png) Aller dans NTP / Broadcast Settings puis définir les paramètres suivant : Broadcast Address 1: IP du NTP Symmetric Key: Les clefs utilisés[](https://cavallone.fr/uploads/images/gallery/2024-11/99xwxZWWO1BeoMe6-image.png) Sauvegarder et Valider la sauvegarde au démarrage. Aller dans Clock / State & Configuration / Timezone Définir le paramètre sur UTC 0 / UTC [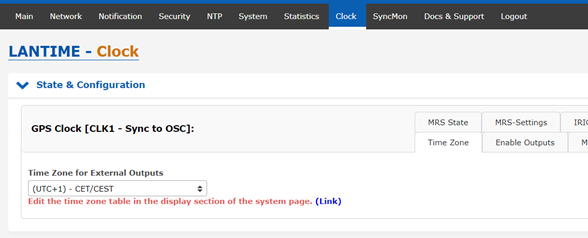](https://cavallone.fr/uploads/images/gallery/2024-11/qBe24VvwTFJdG9La-image.png) Pour modifier l’utilisateur et son mot de passe aller dans System / User Management puis cliquer sur User Administration[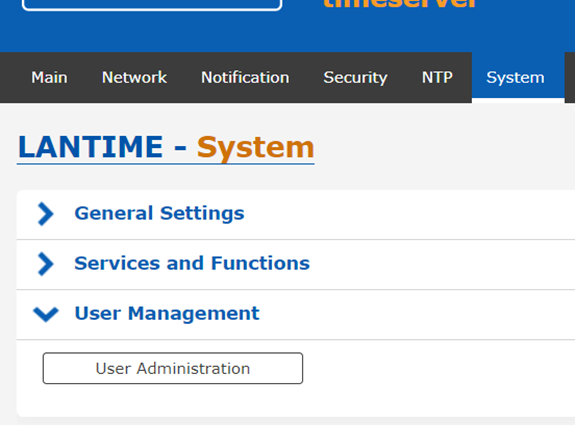](https://cavallone.fr/uploads/images/gallery/2024-11/ifamEZGj2E0N4OLW-image.png) Changer le mot de passe par defaut du root et/ou créé un utilisateur[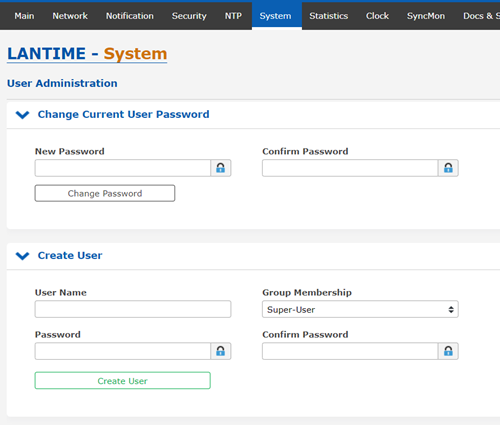](https://cavallone.fr/uploads/images/gallery/2024-11/qszuNxJN78qzCM6i-image.png) ##### IMPORT CONFIG Allez dans système onglets Configuration & Firmware Management [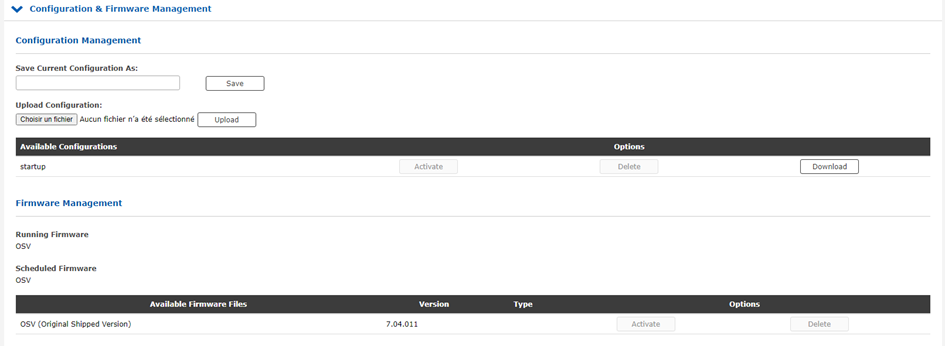](https://cavallone.fr/uploads/images/gallery/2024-11/VB91uoN4h6nU9zLF-image.png) Cliquer sur Choisir un fichier et sélectionner le tgz pour importer la config[](https://cavallone.fr/uploads/images/gallery/2024-11/uoiVcB0vGSjywQ3J-image.png) Une fois sélectionner appuyer sur Upload, le fichier devrait apparaitre dans les configurations available puis appuyer sur activate pour charger la configuration [](https://cavallone.fr/uploads/images/gallery/2024-11/AJxvJz0Qunz4pvNI-image.png) Une fois la configuration chargée le message suivant devrait apparaitre[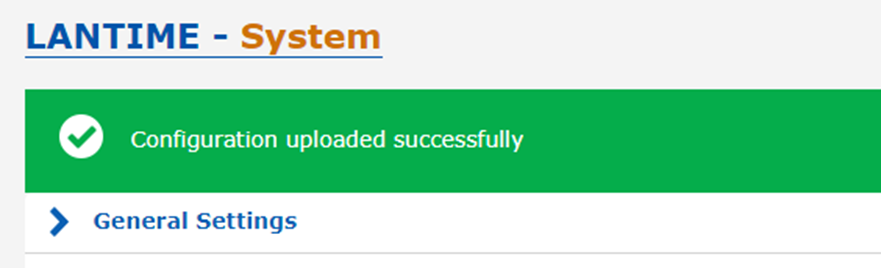](https://cavallone.fr/uploads/images/gallery/2024-11/U2pVi1fYoWCXog1h-image.png) #### Réinitialisation du NTP Allez dans System / Services and Functions puis cliquer sur Reset Factory Defaults [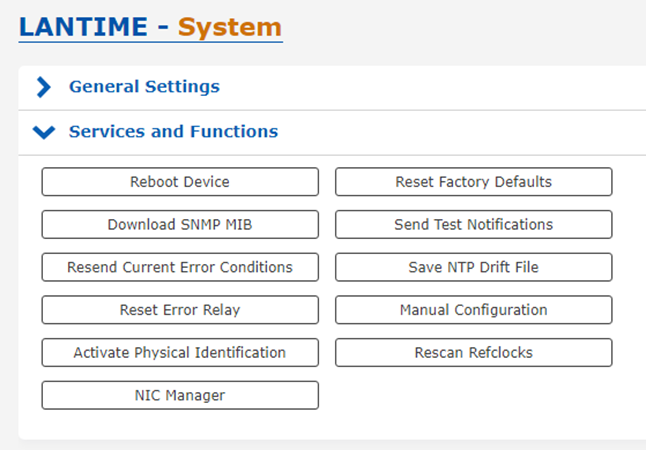](https://cavallone.fr/uploads/images/gallery/2024-11/ajAlN4kejjBZ5zPo-image.png) Le message suivant apparait appuyer sur OK le ntp execute sa réinitialisation [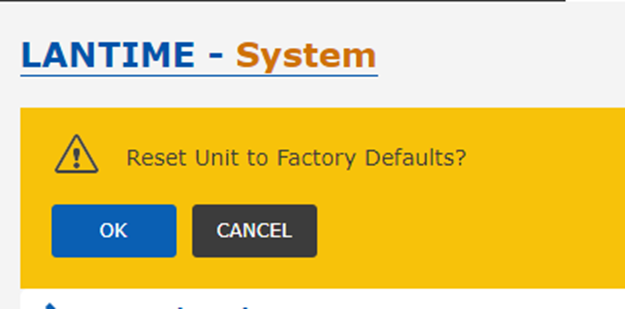](https://cavallone.fr/uploads/images/gallery/2024-11/0VRwjJqBPiImc6f3-image.png) # FIREWALL # Modification host SQUID Se connecter au serveur squid : Une fois connecté modifier le fichier contenant les host server ```bash sudo su nano /etc/squid/host_list/GRP_Linux_Servers ``` [](https://cavallone.fr/uploads/images/gallery/2025-07/fOrkkH1pOqkBjpec-hostlist.PNG) Ajouter ensuite l'@IP comme ci-dessous dans le fichier [](https://cavallone.fr/uploads/images/gallery/2025-07/U47hTSogktWe7jmD-host-ip.PNG) une fois le fichier quitter et enregistrer , exécuter la commande suivante : ```bash squid -k reconfigure ``` [](https://cavallone.fr/uploads/images/gallery/2025-07/lUOhbV6QmV2q9NUt-reconfigure.PNG) Vous verrez la liste des ip apparaître comme suivant [](https://cavallone.fr/uploads/images/gallery/2025-07/iCfXhGMmngYOAloL-application.PNG) Tester si le serveur peut maintenant passer à travers le proxy. # Modification Url Squid Se connecter au serveur squid : Une fois connecté modifier le fichier contenant les host server ```bash sudo su nano /etc/squid/White_liste/Update_Redhat_Centos ``` [](https://cavallone.fr/uploads/images/gallery/2025-07/fOrkkH1pOqkBjpec-hostlist.PNG) Ajouter ensuite l'url comme ci-dessous dans le fichier [](https://cavallone.fr/uploads/images/gallery/2025-07/Rq4arszoDJVhNxYY-modification-du-fichier.PNG) une fois le fichier quitter et enregistrer , exécuter la commande suivante : ```bash squid -k reconfigure ``` [](https://cavallone.fr/uploads/images/gallery/2025-07/lUOhbV6QmV2q9NUt-reconfigure.PNG) Vous verrez la liste des IP apparaître comme suivant [](https://cavallone.fr/uploads/images/gallery/2025-07/iCfXhGMmngYOAloL-application.PNG) Tester si le serveur peut maintenant acceder à l'url. # Stormshield modification d'une règle Se connecter au STORMSHIELD et aller dans POLITIQUE DE SECURITE [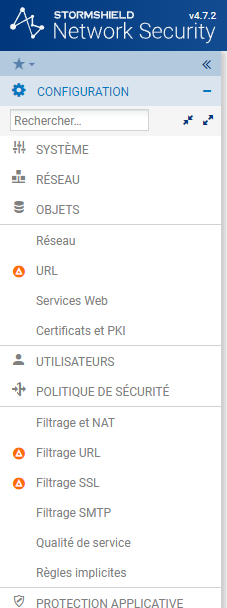](https://cavallone.fr/uploads/images/gallery/2025-07/pKccZOIXvBWacmPb-politique-de-securite.PNG) Créer / chercher la règle à modifier dans la barre [](https://cavallone.fr/uploads/images/gallery/2025-07/gjYg3wEouPQxX1RL-filtrage-nat.PNG) Sélectionner la règle à modifier et faire éditer Nous allons laisser passer le flux dans celle-ci, donc nous allons choisir **PASSER** dans actions [](https://cavallone.fr/uploads/images/gallery/2025-07/zQgRmlS6uD35c1RW-blocage-ou-passer.PNG) Ajoutons les machines/groupes sources [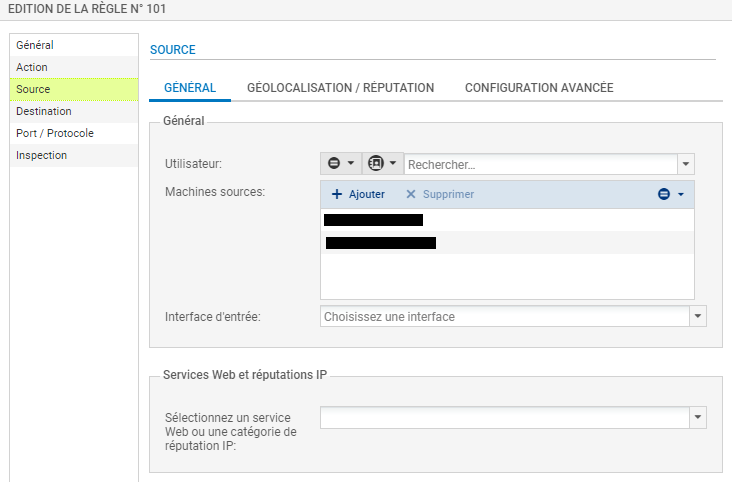](https://cavallone.fr/uploads/images/gallery/2025-07/Zmk6E5Ey8eCBZVvl-source.PNG) Nous devons maintenant ajouter les machines de destination, faire **AJOUTER** et rentrer **l'@IP** ou le **NOM** déjà créé dans les **OBJETS** du Stormshield [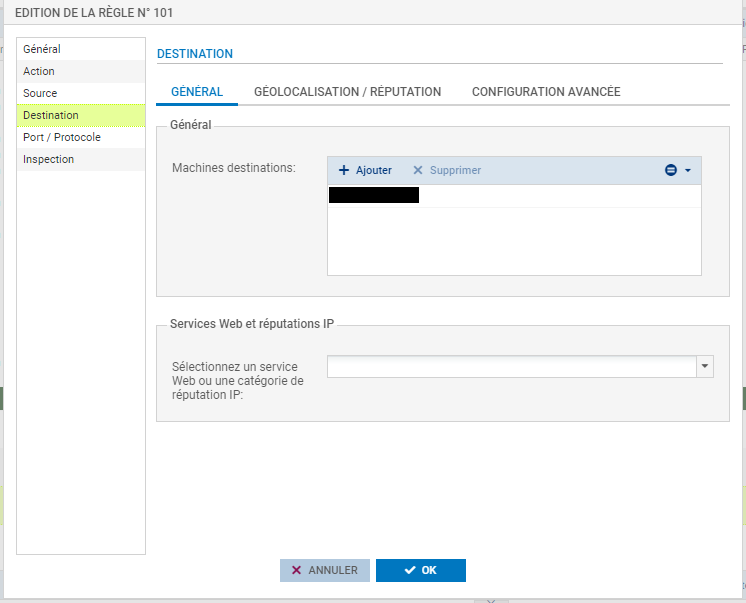](https://cavallone.fr/uploads/images/gallery/2025-07/wWFxXnzxLP5s40tH-editer-la-regle-ip-objet.PNG) Maintenant ajoutons le port que nous souhaitons laisser passer [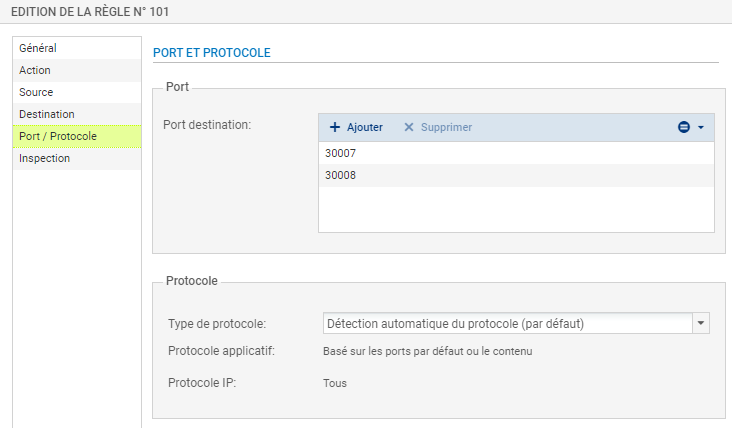](https://cavallone.fr/uploads/images/gallery/2025-07/oM7jYh4semFvvQrH-port.PNG)**SI VOTRE OBJET N'EST PAS EXISTANT CREER LE DEPUIS LES 2 PETITES BARRES DANS AJOUTER ET REMPLIR LA FENÊTRE CI DESSOUS**
[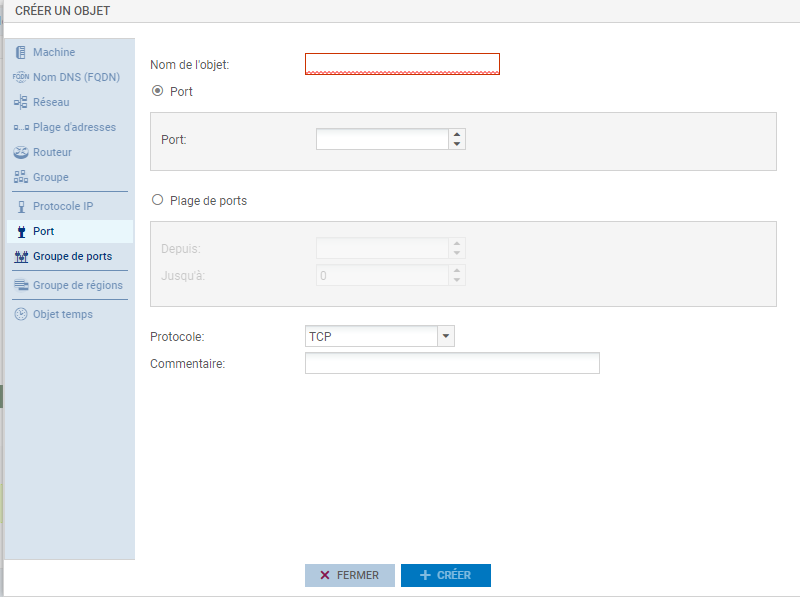](https://cavallone.fr/uploads/images/gallery/2025-07/syGHZAoAYamlGb5D-objet-port.PNG) une fois celà fait, verifier que la règle est bien **ON** [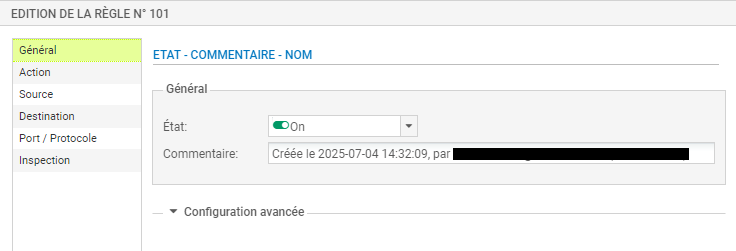](https://cavallone.fr/uploads/images/gallery/2025-07/4UcQeRUt0XT8Tm5N-on-ou-off.PNG) En faisant OK la fenêtre suivante apparaitra il ne vous reste plus qu'a activer celle-ci. [](https://cavallone.fr/uploads/images/gallery/2025-07/kjt0UBgC4bQceA69-vx1k6vqshbuw9y4i-4fduetb6tuegn70c-appliquer.png) # HPE # Mise à jour des OS d’un switch HPE 1 – Connecter un PC portable sur le port console de l’équipement 2 – Remettre l’équipement en mode de configuration « usine » : undo startup saved-configuration delete startup.cfg Y delete lauth.dat Y reboot N Y 3 – Vérifier la version logicielle active sur l’équipement display version 4 – Vérifier les versions logicielles autorisées sur l’équipement display boot-loader 5 – Si la version logicielle active est autorisée uniquement au seul emplacement « main » ou « backup » alors l’autoriser sur le 2ème emplacement boot-loader file boot flash:/5140ei-cmw710-boot-xxx.bin system flash:/5140ei-cmw710-system-xxx.bin slot 1 main Y ou boot-loader file boot flash:/5140ei-cmw710-boot-xxx.bin system flash:/5140ei-cmw710-system-xxx.bin slot 1 backup Y 6 – Si la version logicielle active ne correspond pas à la version « cible » alors configurer le serveur SFTP sur l’équipement system-view public-key local create dsa y 2048 public-key local create rsa y 2048 interface vlan-interface 1 ip address (adresse ip) (mask) undo shutdown local-user LOGIN class manage authorization-attribute user-role network-admin undo authorization-attribute user-role network-operator password simple PASSWORD service-type ssh state active domain system accounting default none authentication default local authorization default local undo authorization-attribute user-profile state active user-group system ssh server enable ssh server authentication-retries 3 ssh server authentication-timeout 60 Undo ssh server compatible-ssh1x undo ssh server port undo scp server enable sftp server enable sftp server idle-timeout 5 ssh user LOGIN service-type all authentication-type password line vty 0 63 authentication-mode scheme idle-timeout 5 0 protocol inbound ssh return 7 – Connecter le PC portable sur un port de l’équipement 8 – Initialiser une session SFTP entre le PC portable (Client) et l’équipement (Serveur) Remarque : Si le client SFTP utilisé est WinSCP alors sélectionner Options/Préférences/Solidité et déactiver « Autoriser la reprise/transférer vers un fichier temporaire pour » puis cliquer sur OK 9 – Transférer, via le client SFTP, la version logicielle dans la flash de l’équipement au niveau de la « racine » 10 – Vérifier les versions logicielles contenues dans la flash de l’équipement dir flash:/ 11 – Autoriser la version logicielle téléchargée à l’emplacement « main » boot-loader file flash:/5140ei-CMW710-xxx.ipe slot 1 main Y Y 12 – Redémarrer l’équipement sur la version logicielle téléchargée reboot N Y 13 – Vérifier la version logicielle active display version 14 – Autoriser la version logicielle téléchargée à l’emplacement « backup » boot-loader file boot flash:/5140ei-cmw710-boot-xxx.bin system flash:/5140ei-cmw710-system-xxx.bin slot 1 backup Y 15 – Supprimer les versions logicielles non utilisées contenues dans la flash de l’équipement delete flash:/5140ei-cmw710-boot-xxx.bin Y delete flash:/5140ei-cmw710-system-xxx.bin Y # CISCO # Commandes Enregistrer la configuration active write Afficher la configuration active show running-config Informations matériels du switch show version Découvrir les équipements connectés show cdp neighbors Afficher les informations des PoE show power inline Afficher les différents TRUNK show interfaces trunk Afficher le détail des VLANs show vlan Créer un VLAN enable conf t vlan 2 vlan 2 Supprimer un VLAN enable conf t vlan 2 no vlan 2 Réinitialiser par défaut une interface enable conf t default interface range GigabitEthernet1/0/1 - 48 Création d'un teaming LACP enable conf t interface range GigabitEthernet1/0/1 - 2 channel-group 1 mode active channel-protocol lacp exit enable configure terminal interface port-channel 1 switchport trunk encapsulation dot1q switchport mode trunk switchport trunk allowed vlan add 1 exit Statut de toutes les interfaces enable show interfaces status statut d'une interface spécifique enable show interfaces Gi1/0/1 status Désactiver une interface enable configure terminal interface gi1/0/1 shutdown end Modifier l'IP d'une interface enable configure terminal interface Vlan3 ip address 192.168.1.2 255.255.255.0 exit Ajouter une passerelle par défaut enable configure terminal ip default-gateway 10.0.0.60 Modifier un range de port enable configure terminal interface range GigabitEthernet1/0/1 - 48 Activer une interface enable configure terminal interface gi1/0/1 no shutdown end # Configurer le service SNMP enable configure terminal snmp-server community "nom" snmp-server location "localisation" snmp-server contact "mail@mail.com" end write # Calcul Subnet Mask Caclul s'effectuant en puissance de 2 Va jusqu’à /32 max Pour exemple /27 32-27 = 5 > 2 puissance 5 > 32 Je retire 32 a 256 Mon subnet est en 224